Utilities
Download the Q-SYS log file (when requested by Q-SYS Support), change the NV-32-H (Core Capable) and Q-SYS Core 510i processor configuration mode, and reboot the Q-SYS Core processor.
System Information
In the event of a support request, Q-SYS Support may require a copy of the Q-SYS log for troubleshooting purposes.
Click Download to save a copy of the Q-SYS log (.qsyslog) to your PC. The filename includes the Q-SYS Core name, as well as a UTC date and time stamp.
Note: Q-SYS Support uses a special log viewer application to interpret the log and obtain key information about the health of your Q-SYS system, including Core status, design information, peripheral status, streaming issues, Q-SYS Feature Licensing information, and network information.
Mode
Available only for the Core 110f, Core 8 Flex, Core Nano, NV-32-H (Core Capable) and Core 510i. Select a configuration mode:
Core
The device is deployed as a Q-SYS Core processor, with full processing capabilities for audio, video, and control. Click Switch to update the mode and reboot the device.
Note: Once the device reboots, you must save and run a design to the Core before configuring it using Q-SYS Core Manager or upgrading its firmware.
Peripheral
The device is deployed as a Peripheral. Click Switch to update the mode and reboot the device. In this mode, add the device from the Inventory menu in your design, and then configure a separate Q-SYS Core for processing. Once the device reboots, you can then configure it using Peripheral Manager, which is accessible from Configurator in Q-SYS Designer Software (Tools > Show Configurator).
Note: Switching to Peripheral Mode turns off LAN B and clears its settings. Use Peripheral Manager to configure the device's network settings.
QSD Authentication
Toggle On or Off the preference to allow downgrade to earlier versions. It is disabled by default and is not persistent.
Note: Force Downgrade resets all camera settings to factory defaults. There is no data migration when downgrading camera firmware. Ensure you have documented your current camera configuration before proceeding with a downgrade.
Core Reboot
Click Reboot to stop the running design and reboot the Q-SYS Core processor. A reboot cycle typically takes a few minutes.
Camera Firmware Upgrade
When a new firmware version is available for a camera, you can upgrade it from this page. For most peripherals, firmware is upgraded automatically when a design is pushed to the Core. However, some devices require a manual upgrade.
Note: The NC-Pro15x does not support automatic firmware upgrades on design push. You must upgrade NC-Pro15x firmware manually using the Program Selected Cameras button.
To Manually Upgrade Camera Firmware
-
In Core Manager, navigate to the Cameras page
-
Verify the camera shows a Needs Upgraded indicator.
-
Select the camera(s) and click Program Selected Cameras.
-
Read the power warning and click OK to proceed.
-
A visual indicator and countdown timer confirm the process has started.
Note: Do not remove power from the camera during this process.
-
When the countdown completes, verify the updated firmware version on the Cameras page.
For detailed step-by-step instructions, refer to the Q-SYS Knowledge Base article.
Force Downgrade
Force Downgrade reprograms a camera with an older firmware version. When Force Downgrade is enabled:
-
All camera settings are reset, including camera name, network configuration, device configuration, and image settings.
-
Settings cannot be preserved or restored automatically. There is no data migration.
CAUTION: Force Downgrade erases all camera settings with no option for recovery. Verify you have documented the camera's configuration before proceeding.
To Force a Firmware Downgrade
-
Select the camera(s) and enable the Firmware Downgrade selector.
-
Click Program Selected Cameras.
-
A dialog warns that cameras will lose their settings. Click OK to proceed or Cancel to exit.
-
Read the power warning and click OK to confirm.
Note: Do not remove power during the process.
Firmware Patches
Within Q-SYS Reflect, you can apply patches to both firmware and software.
Note: You must be an Administrator to Install or Remove Firmware Patches.
Installing and Applying a Patch
Once a Firmware Patch is available, information on version, release date, and further details will appear. It will say "No patches for firmware version" if there are no patches available for download.
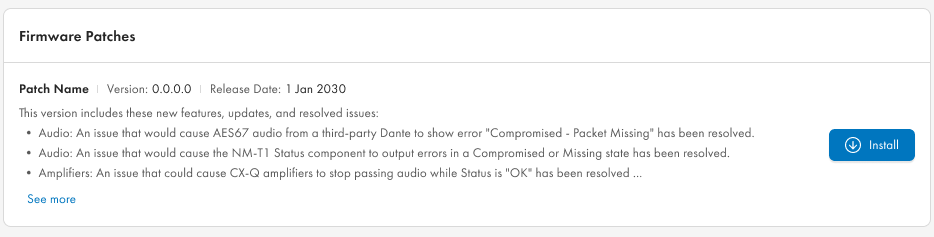
- When ready, click Install.
- It will confirm that the patch installation has started and alert other actions will not be available. When prompted, click on Install.
- A progress bar will appear as the patch installs.
- Once it is finished, the Core will reboot automatically and apply the patch.
Removing a Patch
Installed Firmware Patches are easily removed.
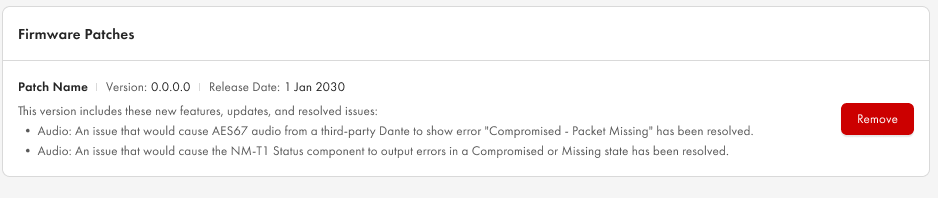
- When ready, click Remove.
- It will confirm that the patch installation has started and alert other actions will not be available. When prompted, click on Remove.
- When finished, the Core will reboot automatically without the patch.
Updating a Patch
When a new version of the Installed Patch is available, it will show in the available Firmware Patches section. You will see a message that indicates the older version must be removed prior to the newer version being installed. See the steps for Removing a Patch